Bed Tramming Your Ender 3 Pro - Leveling 4 Corners Using Marlin Firmware
Background:
Your printer will print a tiny amount of filament at a time. Each bit of filament it extrudes needs to stick to something - either the bed (your first level) or to the previous layer of filament you printed.
Getting your bed level so the nozzle is equally spaced from the bed at every point of the print area will ensure you have a good first layer. Bed tramming is the first step - getting all 4 corners to be equally distanced from the bed. This is sometimes called bed leveling, although calling it tramming or "leveling corners" is a better term, since we also have mesh bed leveling and auto bed leveling.
If you're interested in more about why this matter/what goes into this, you can read my blog post about it -> Bed Leveling/Tramming/First Level Squish on Ender 3 Pro.
We will use the Marlin Level Corners LCD command. This requires a fairly modern version of Marlin and may not be present if you have an older version.
What if I don't see these options?
If you don't see this, you need to update your firmware.
I had this problem and I did not find anyone who was focusing on providing Ender 3 Pro, 4.2.2 board firmware - so I had to build Marlin for the Ender 3 Pro (thankfully, using config files from the Marlin project and modifying them). You can get it and install it here -> Ender 3 Pro, 4.2.2 board firmware . Pay special attention to whether you have a CR Touch or not.
Tramming Your Ender 3 Pro Bed a.k.a. Level Corners
To tram your bed, we're going to:
1. Heat up Nozzle and Bed to (or close to operating) temperature
2. Adjust each corner one at a time.
Note: A related, but separate discussion is how to ensure your Z end stop is in the correct location and if it is too low or too high. I use a CR Touch (one of the recommended Ender 3 Pro Accessories) so I don't have a Z end stop anymore. However if you have one, you want to align it such that when your X Axis is resting on the end stop, the metal hot end is barely touching the print plate. Hopefully you have it set up reasonably well from the prior assembly video.
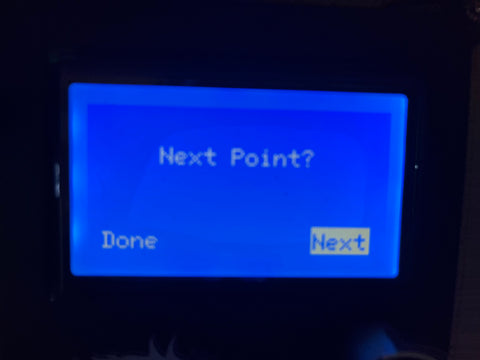
It's fairly easy and straightforward using the functionality built into Marlin 2.0. Don't be scared by the screenshots - I'm including them so it's easy for folks new to 3D Printing to follow along if they've never used the menu before. Most of the screens are just heating the nozzle and bed.
Step by Step Instructions with Screenshots
1. Click on the wheel to bring up the menu screen. Scroll down and select temperature

2. You have Nozzle and Bed and need to set both. A quick note: metal will expand and change shape when hot. So, we want to try to tram the bed realistically the way it would be heated while printing. If you heat the nozzle to 200 you'll get the best results, but you'll also get filament leaking out and will have to wait a while for it to all drain out. So, I instead set my nozzle to 140 - it's close enough and my filament won't leak. Select Nozzle.

3. On the next screen, set the value to 140 by turning the wheel clockwise (to the right). Click on the wheel and you'll be sent back to the temperature screen

Ok we're back at the temperature screen. Now scroll down and select bed, and click on the wheel.

Set the bed to whatever temperature you normally print at. It will normally be 60 or 70, but it may be different depending on what kind of filaments you use. Using 60 or 70 for this though will be good enough if you are not sure.

From here, click the wheel a few times to get back to the top menu. Then click it to select Info screen

You will see your Nozzle and Bed heating up to 140 and 70 degrees (or whatever you set it to). Wait for this to complete and I would suggest wait 1-2 minutes after that to allow the bed time to settle in.

Now we're going to use the built in bed tramming. Click the wheel, and then select Motion from the menu

On the next screen, select Bed Leveling

Scroll pretty far down, and click the wheel to select Bed Tramming

Your printer will first home all the axes. Just wait and let it complete this step.


What if I don't see these options?
If you don't see this, you need to update your firmware.
I had this problem and I did not find anyone who was focusing on providing Ender 3 Pro, 4.2.2 board firmware - so I had to build Marlin for the Ender 3 Pro (thankfully, using config files from the Marlin project and modifying them). You can get it and install it here -> Ender 3 Pro, 4.2.2 board firmware . Pay special attention to whether you have a CR Touch or not.
Back Up to Tuning and Calibrating Ender 3 Pro
or
